User Report
All users added to the portal are listed in the User Report. On this page you have the ability to –
- Manage Users: Edit User Profiles, Edit User Tasks, Quick View User Tasks, Delete Users.
- Manage Reports: Create, Save, & Export Custom Reports.
- Manage Bulk Emails: Create, Save, & Send Bulk Emails to specific users.
- Send Welcome Emails: Select users to send the Welcome Email to.
- Sync Users to Floor Plan: Select users to sync to the floor plan.
- Bulk Download: Bulk Download files submitted by specific users.

To access the User Report, go to the main menu, select Reports and click User Report.
Manage Users: In the Action column there are 4 buttons – 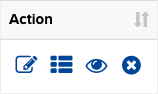
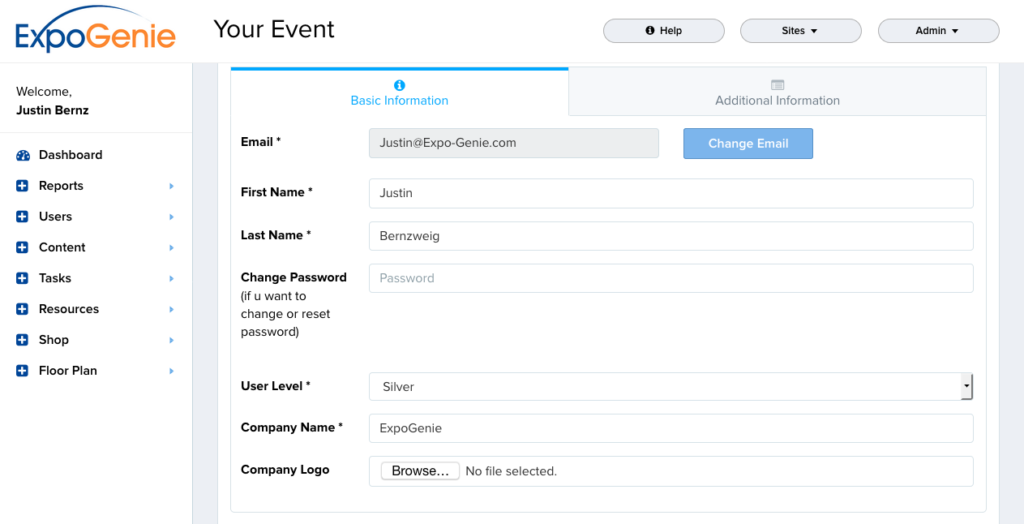
- Edit User Profile: The first button in the Action column. This button will take you to the Edit User Profile page for the selected user.
- User Tasks: The second button in the Action column. This button will take you to the selected User’s Task Page. Here you can see the User’s task list. You can complete tasks for the User as well as download individual files that have been uploaded.

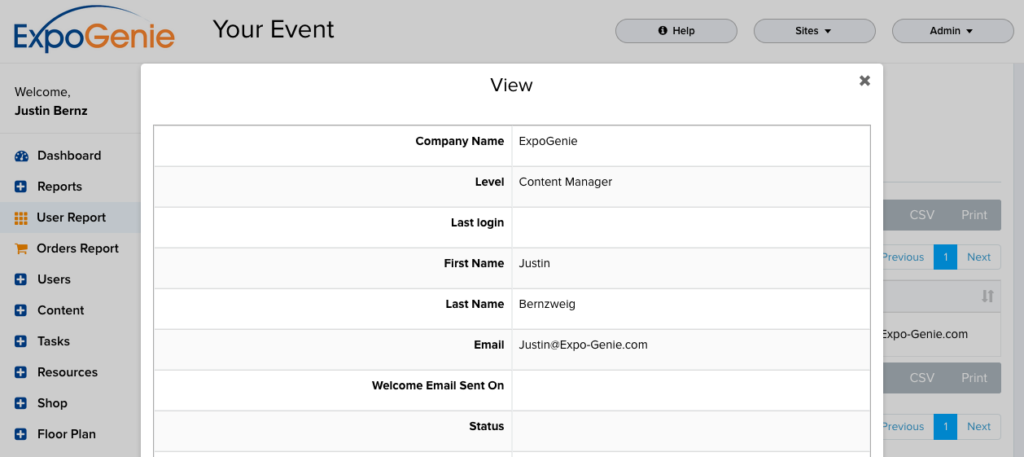
- View Profile: The third button in the Action column. This button opens a pop-up window showing the User’s profile and status of tasks.
- Remove User: The fourth button in the Action column. This button allows you to delete a User. An “Are You Sure?” pop-up window will open, click “Yes, delete it!”.

Manage Reports: To Create & Save a Custom Report, click the Customize Report button.
- Click the Show Columns drop down menu and select the items to be shown in the custom report.
- To add Filters click the the Add Rule button, select an item to filter.
- Under Sort By section select the item the report will be sorted by, and either Ascending or Descending.
- Click the Load a Report drop down and select Save Current Template As.
- In the Report Name field enter the name for the custom report.
- Click the Action button and select Save. The report has now been added the the Load a Report drop down menu on the Report page.
- Click the Run Report button to generate the report.

To Export a report, select the report from the Load a Report drop down menu, then click one of the export option buttons – Excel, .CSV, or Print.

Manage Bulk Emails: Create, Save, & Send Bulk Emails to specific users –
- Select the users you want to send the Bulk Email to. The red number bubble on the Bulk Action menu shows the number of users selected.
- Click the Bulk Action drop down menu and select Bulk Email. This will take you to the Bulk Email page.
- Enter the Required Fields – From, Subject, Message. There is an Optional Field for a BCC email.
- To add merge fields in the Message, click the Insert Merge Fields button and select the merge field you want to insert..
Send Welcome Emails: Select specific users or all users to send the Welcome Email to.
- Select the users you want to send the Welcome Email to. The red number bubble on the Bulk Action menu shows the number of users select.
- Click the Bulk Action drop down menu and select Welcome Email.
- A pop-up will appear to remind you that if any of the users in your selection have already been sent the Welcome Email, re-sending will reset their password.
- Select the Welcome Email you want to send from the Welcome Email Template drop down.
- Click the Confirm button to send the Welcome Email.
Sync to Floor Plan: Select users to add to the Floor Plan exhibitor list cue for booth assignment.
- Select the users you want to sync to the floor plan. The red number bubble on the Bulk Action menu shows the number of users select.
- Click the Bulk Action drop down menu and select Sync to Floor Plan.
- The users are now available to assign booths to on the floor plan.
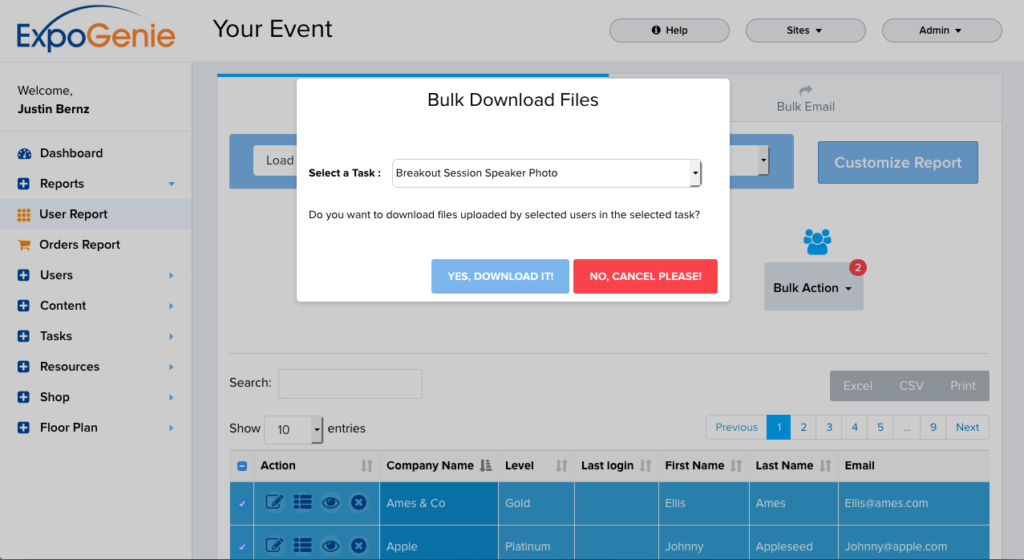
Bulk Download: Select users to download files submitted from Upload Tasks.
- Select the users you want to download a submitted file from. The red number bubble on the Bulk Action menu shows the number of users select.
- Click the Bulk Action drop down menu and select Bulk Download. A pop-up will appear.
- Click the Select a Task drop down menu and select the task file to download.
- Click the “Yes, Download it!” button to download a .zip file.
- Open the .zip file then open the folder it creates to see the files.